Credentials
What are credentials
To communicate with any GAIP endpoints, credentials are required. This credentials can be generated from Maira Console. Credentials are project based.
Once a project is created, you can issue credentials for it. You can create multiple credentials based on your needs and can issue or revoke/stop them anytime.
Types of credentials
There are two types of credentials:
- Project key and API key: Used for server-to-server communication.
- Client key: Used for client to server communication.
Both types of credentials can be used to communicate with Maira endpoints.
Whitelisted domains
A whitelisted domain is a domain (Such as gigalogy.com or abc.com) that has been explicitly approved to use your credentials for calling our endpoints.
We recommend adding ‘whitelisted domains’ when creating credentials to enhance your project’s security. This ensures that only specified domains can call our endpoints using your credentials, preventing unauthorized access and reducing misuse.
Note
Please note that Gigalogy does not keep a copy of your API key, if you lose the key, create a new credential and Stop the credential with lost key.
Create credentials
Step 1 - Navigate to your project in Maira Console
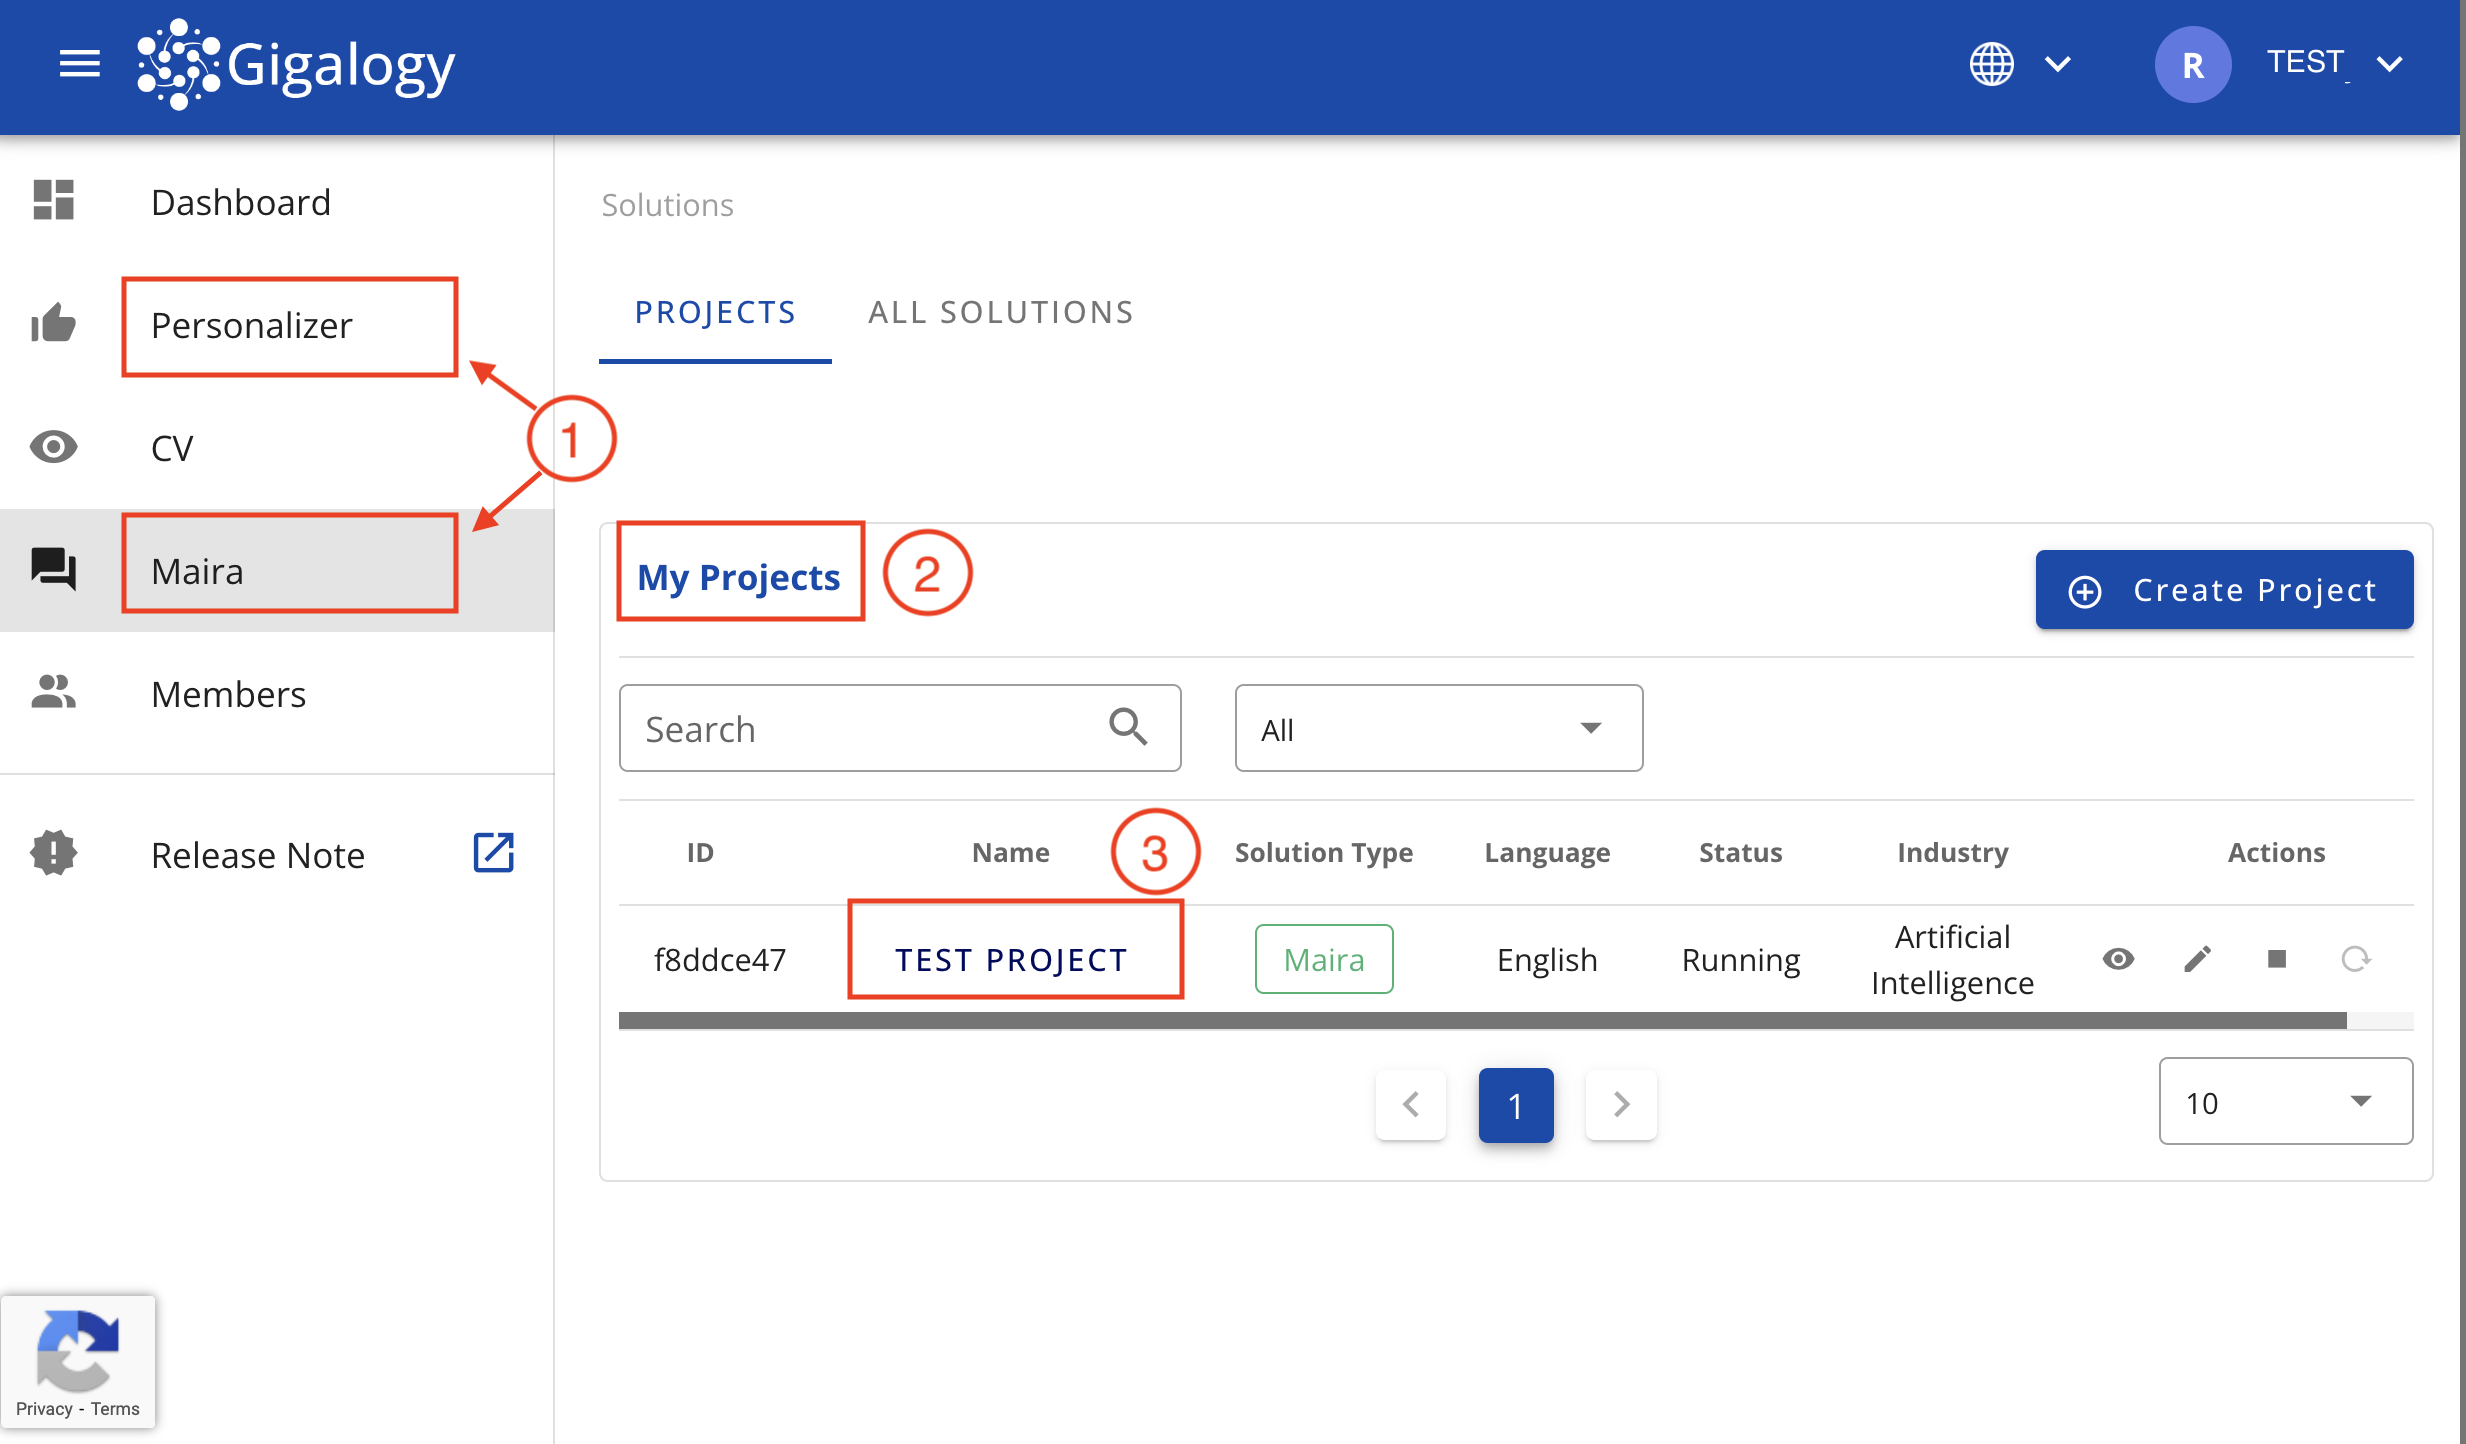
- Go to the solution, where you have created the project
- Find the table "My Projects". Here all your projects of that solution will be listed
- Click on the project name to go inside the project. Note that depending on your project status, you might land on the "DETAILS" page or "SETUP" page. We will discuss that in a different tutorial. For now, only access the project following this steps
Step 2 - Navigate to your project "Access" Tab
Once inside the project, you will see tabs at the top, such as "DETAILS", "SETTINGS", "INSIGHTS", etc. Click on the "ACCESS" tab.
Step 3 - Create credentials
In the ACCESS page, navigate to Section "Credentials". Click on the blue “Plus” (⊕) button on the right side of this section.
Step 4 - Credential detail
In the pop-up, you need to fill in three fields:
- Credential Name: Provide a meaningful name for your credential, making it easy to identify or locate later.
- Credential Type: Choose between two types of credentials:
- Project and API Key: Best for server-to-server integrations. Avoid using this if there’s a risk of public exposure.
- Client Key: Suitable for client-to-server integrations, such as direct communication from your front-end to GAIP servers.
- Whitelisted Domain (Optional): You can whitelist specific domains to restrict where the credential can be used, adding an extra layer of security.
Click on the "Save" button to proceed
Step 5 - Save your credentials
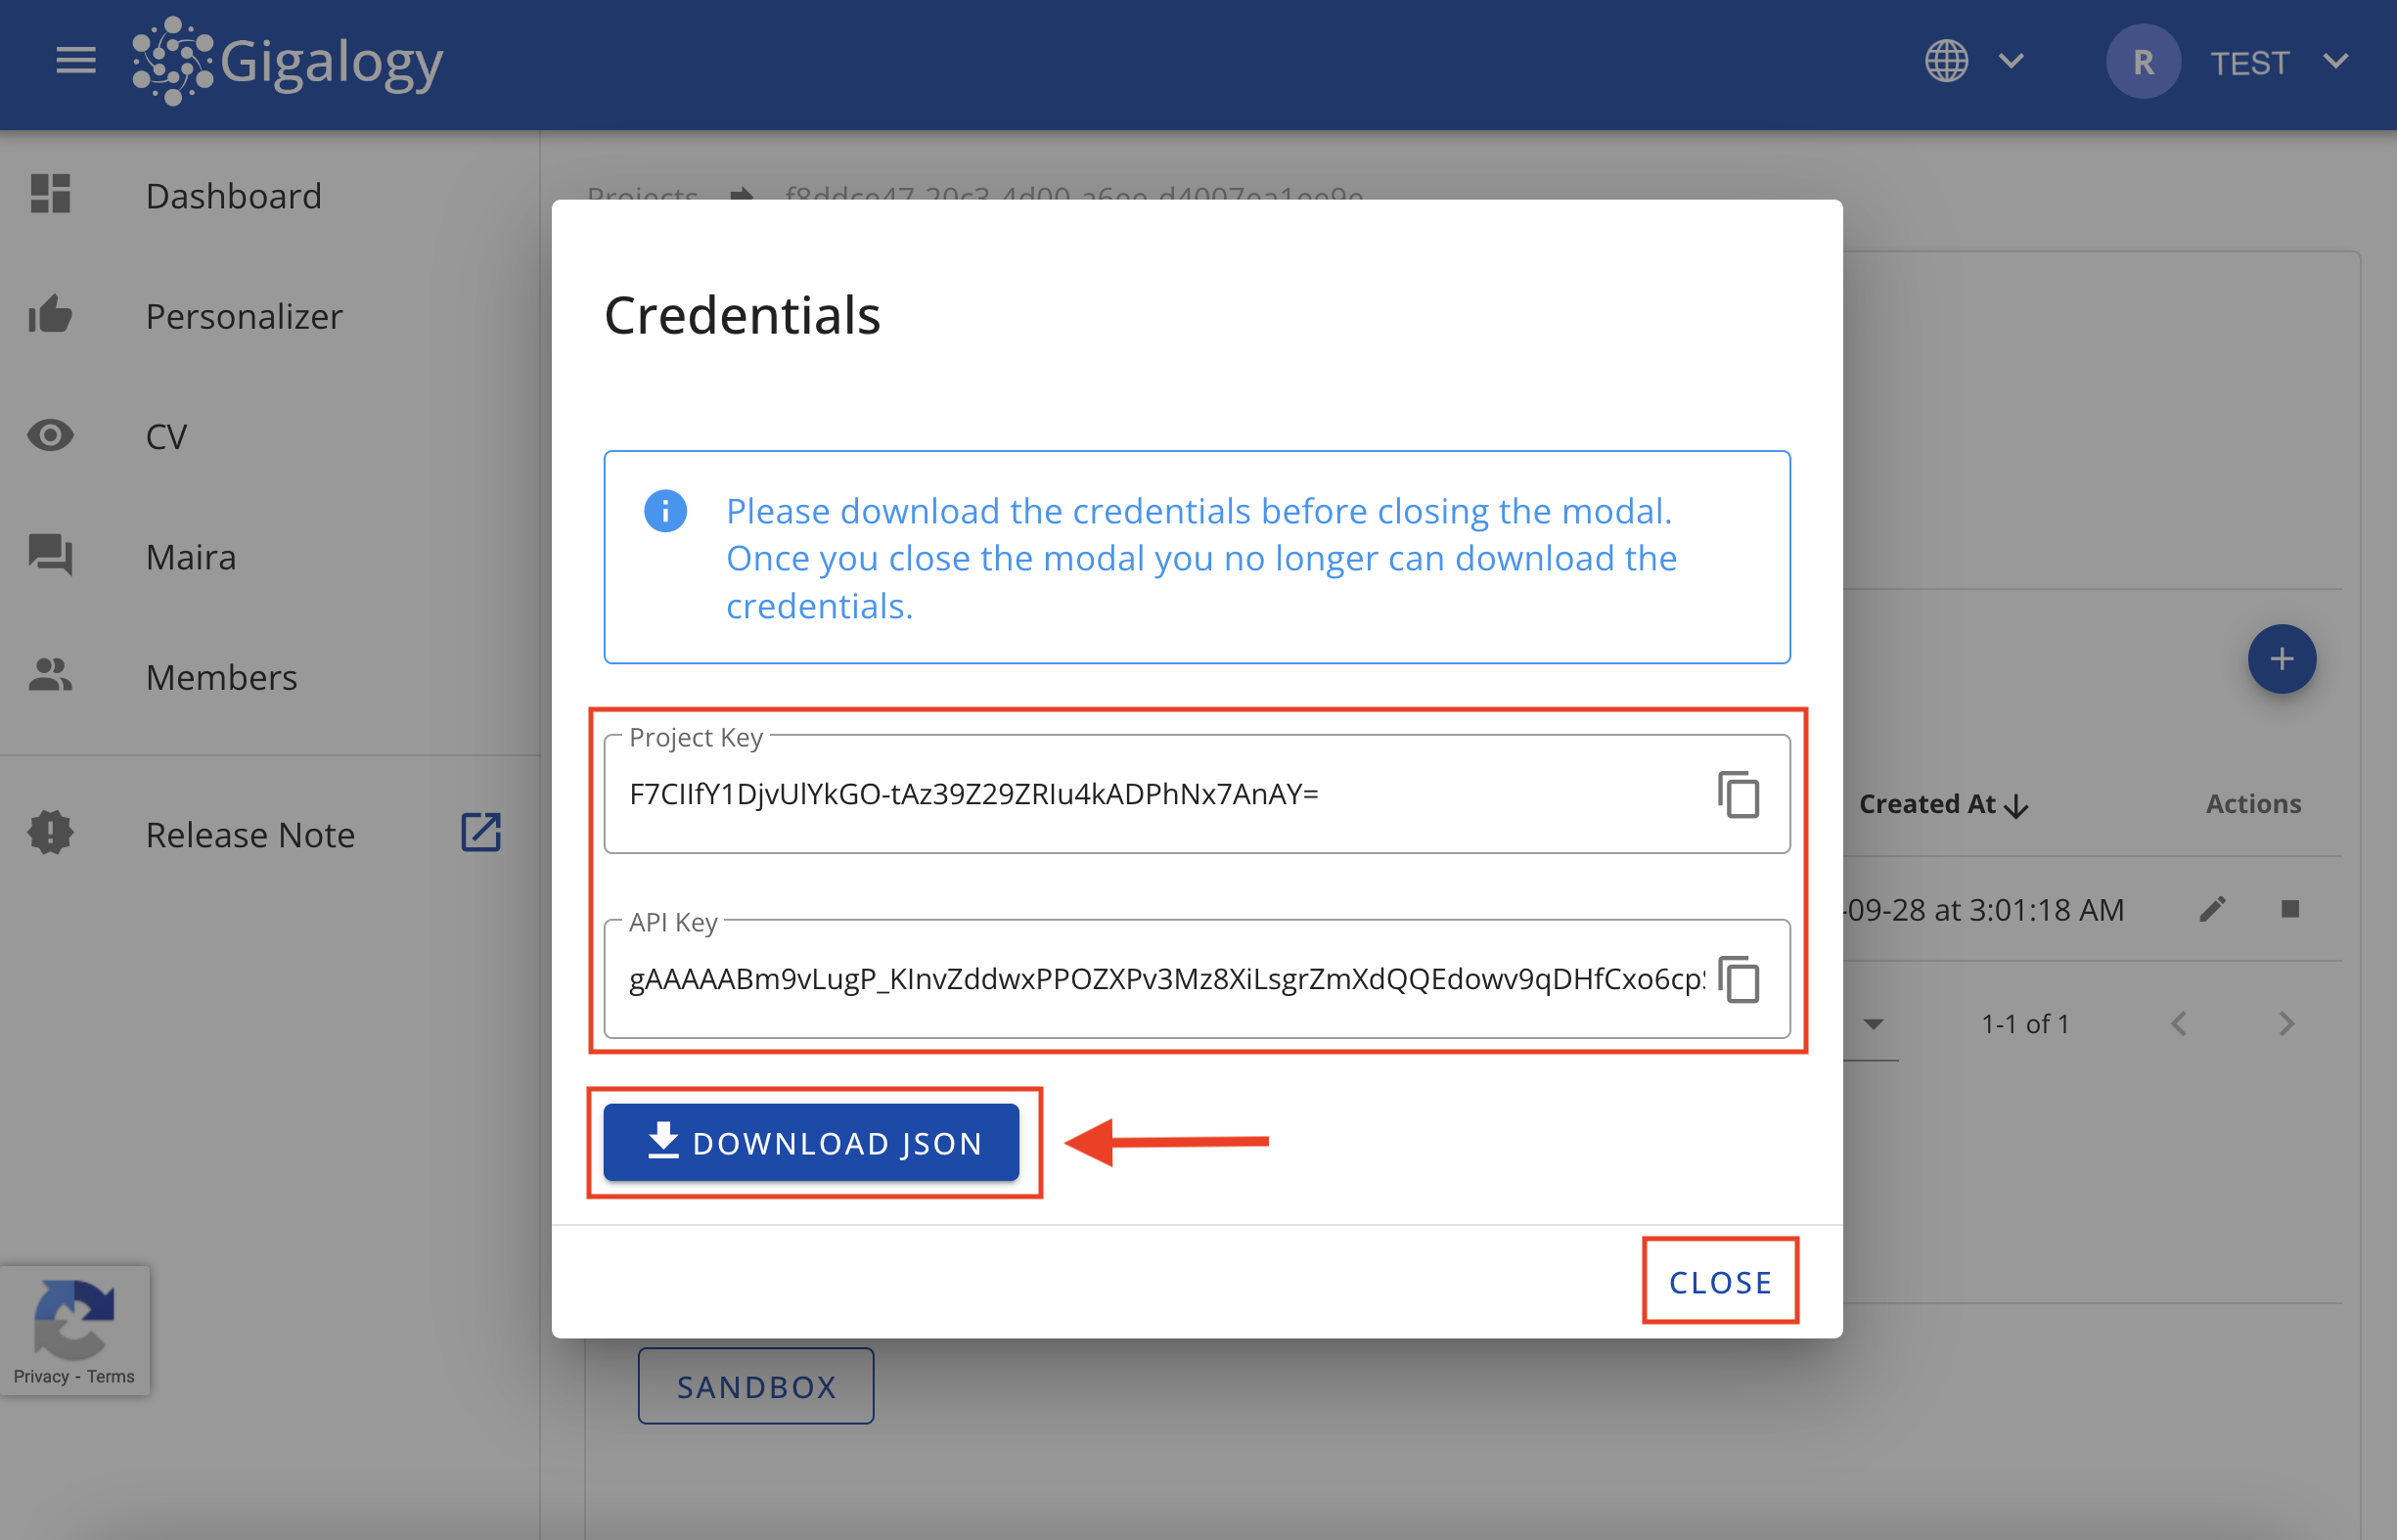
On the next screen, you will see your credential. Please save it by downloading the JSON file or copying and pasting it to a secure location. Once saved, click Close.
NOTE: This is the only time this credential will be shown. If lost, a new credential needs to be generated. Gigalogy does not save your credential.
Now your credentials are ready and you can see it in the "Credentials" table under the project "ACCESS" tab.
Note
- Credentials can be checked for their current status under the "Status" column.
- A credential can be deactivated using the "Actions" column.